Check Bear/Black Bear/ Teddy Bear
You can also check the production version of the code on my webpage: klemenko.pl
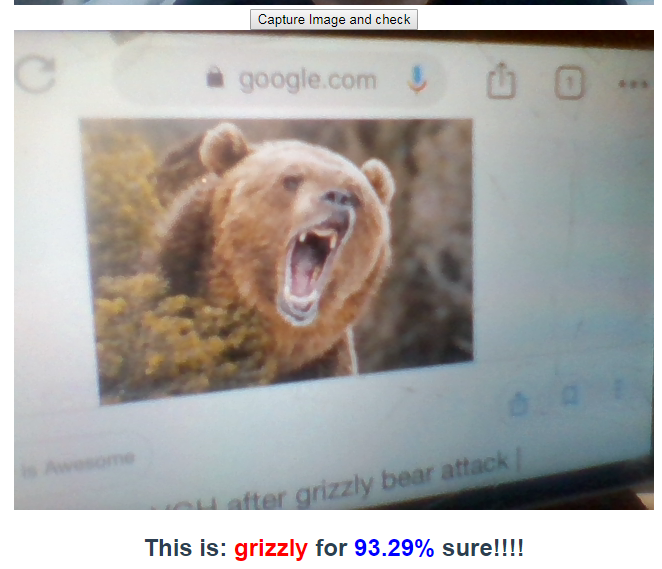
This is a bear recognition sample. You can put a bear, black bear or teddy bear to recognize them. Images for bears can be found in the Google images (try search: Grizzly, black bear or teddy bear).
Check Skin
This set is based on the skin recognition based on the ISIC-Archive. Images can be found in the webpage. https://www.isic-archive.com/. Skin Imaging Collaboration: Melanoma Project. The algorithm can recognize if the skin changes is benign or malignant.
How to use your model in the production
When your model is ready, now need to move it to the production server. That means that if you use it as a GPU server this will cost a lot in the cloud. Fortunately, you can use a CPU server and even t2.micro Amazon machine available as a Free Tier. Below I describe step by step process to prepare this kind of server to use.
The result is available at the sever:
Model as a JSON AWS Server
Prepare machine
- Create the Ubuntu Machine (not Deep learning) as
t2.medium(with 4GB of RAM) machine. The reason for this is that on thet2.micromachine with 1GB of RAM you cannot install fast.ai and you will get the Memory error response. You will change your machine tot2.microwhen you finish. (detailed information on how to prepare and login to the machine you can be found in the https://alexiej.github.io/deepnn/#installion-aws-v-1-0)


The only difference is security group that allows you to access by the IP (80), the default IP for http server.

- You need to login to your machine (login:
ubuntu) and installpip3.
sudo apt-get update
sudo apt-get install python3-pip
- Install fast.ai and jupyter notebook.
pip3 install fastai
pip3 install jupyter notebook jupyter_contrib_nbextensions
pip3 install python-multipart
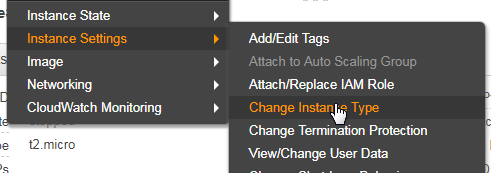
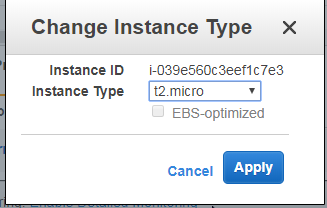
- Stop the instance and change instance type to
t2.micro, and run again.
- Prepare configuration and password for jupyter notebook, and next run jupyter. You will check if your
fast.ailibrary works properly.
jupyter notebook --generate-config
jupyter notebook password
jupyter notebook --port=8002 --no-browser --ip=0.0.0.0
Verify that the port and your IP is in the `security group` list

Login to the notebook, and upload sample image and your exported model done by the function
learn.export()to your subfolder model (export.pkl). Verify that you have similar folder structure.You can upload your files by the
jupyter notebookor WinSCIP

- Run test script to verify that your model works properly.
from fastai.vision import *
defaults.device = torch.device('cpu')

learn_bear = load_learner('bears')
img = open_image('teddybear.jpg')

pred,_,losses  = learn_bear.predict(img)

data = sorted(
        zip(learn_bear.data.classes, map(float, losses)),
        key=lambda p: p[1],
        reverse=True
    )

print(pred)
print(data)

Install JSON Server
Now you can close your yupyter notebook and it’s time to install JSON server.
pip3 install starlette
pip3 install uvicorn
- Prepare
server.pyfile (you can write this invimor even in thejupyter notebook)
# Standard import libraries
from starlette.applications import Starlette
from starlette.responses import JSONResponse
from starlette.middleware.cors import CORSMiddleware

import base64
import ssl

# load learner for fast.ai
from fastai.vision import *
defaults.device = torch.device('cpu')
learn_bear = load_learner('bears') # !! YOUR FOLDER OF THE MODEL!!

from io import BytesIO

import uvicorn
app = Starlette()
# app.add_middleware(CORSMiddleware, allow_origins=['*']) # !! USE ONLY WHEN JSON SERVER IS DIFFERENT THAN HTTP SERVER !! #

# encode image send as base64 string.
def getI420FromBase64(codec):
    # get codec from http
    # codec = codec.encode()
    base64_data = re.sub('^data:image/.+;base64,', '', codec)
    byte_data = base64.b64decode(base64_data)
    image_data = BytesIO(byte_data)
    return image_data


# predict image and get result
# img - is a byte array return from getI420FromBase64
# learner is loaded learner
def predict_image_from_bytes(img, learner):
    img = open_image(img)
    pred,_,losses  = learner.predict(img)
    data = sorted(
            zip(learner.data.classes, map(float, losses)),
            key=lambda p: p[1],
            reverse=True
        )

    # return response as a JSON string
    return JSONResponse({
        "predicted": str(pred),
        "prob": data[0][1],
        "learn": data
    })

# To check if server working
@app.route("/ping", methods=["get"])
async def ping(request):
    return JSONResponse({
        "isWorking": "Yes"
    })

# route to recognize bears from images, by link http://IP:8000/bears
@app.route("/bears", methods=["POST"])
async def bears(request):
    data = await request.form()
    data = data["file"]
    img = getI420FromBase64(data)
    return predict_image_from_bytes(img, learn_bear)


# main function, run server as uvicorn
if __name__ == '__main__':
    uvicorn.run(app,
            host='0.0.0.0',
            port=8000)
The main function is to run uvicorn server at port 8000 (you need also allow access to port 8000 for all IP addresses in the security group to work with your server from the javascript).

The @app.route("/bears") will add location for your server to run from the link /bears . After this function gets the request with the file uploaded in the base64 format, it converts the file to the binary list and predicts the type of the image from bytes.
Run Server
- Run your server.
nohup python3 server.py &
This will run your server in the background so you don’t have to keep your console still open. Now you can test your link, go to a webpage http://YOUR_IP:8000/ping, and you should see a JSON response.

If you want to kill the server, list the server.py processes, and run kill command.
ps -ef | grep server.py
kill 1705

Setup one IP address
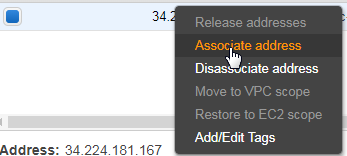
Normallly everytime you restart your machine you’ll get a new IP address. In the AWS you can get one static IP address from the pool of addresses.
From Elastic IP click at allocate new address. You’ll be charged for the IP address when it is not assigned to your isntance. When you remove your instance, please also remove your IP address or assign to other isntance.


Next click at associate address with your instance.
Use server with a certificate
Normally when your JSON server is the same as HTML server, you don’t have to use https, but when your webpage uses https protocol and your JSON server doesn’t, you will see the error.

The solution is to useSSL protocol on both servers, and create a domain for your JSON server to get a certificate, and next buy a certificate for that domain (it costs around 10$ for one year). The other option is to not use SSL protocol on the webpage and JSON server and leave the page unprotected. (impossible when you want to use github pages).
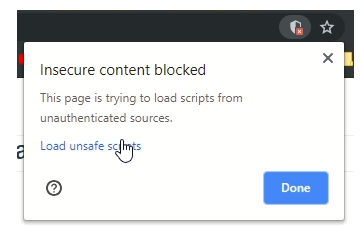
If you want to use generated certificate by yourself without any authority (CA) the chrome will block your communication between your webpage and JSON server, without possibility to load script. (don’t use this option)

f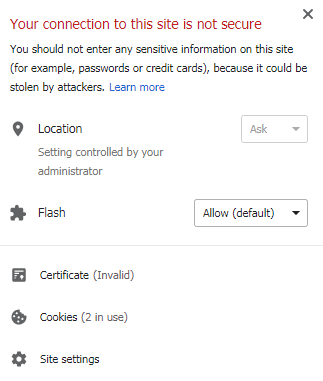
The other problem with the unprotected page (without SSL) is that most browsers block access to the camera, and user needs to accept dangerous scripts.
For now you can get a free certificate for 90 days from COMODO SSL https://ssl.comodo.com/free-ssl-certificate.php. Also there is a special deal in the hosting service https://www.nazwa.pl/ , when you buy a domain (.pl domain is for free) you will get a free certificate for one year (You need to wait for about 4-7 days to generate a certificate).
When you download your certificate from nazwa.pl:

Upload both files to the server and next change your configuration in the server.py file.
import ssl

# main function, run server as uvicorn
if __name__ == '__main__':
    uvicorn.run(app,
            host='0.0.0.0',
            ssl_version=ssl.PROTOCOL_SSLv23,
            ssl_keyfile="./key.key",        # Note that the generated certificates
            ssl_certfile="./cert.crt",      # are used here
            port=8000)
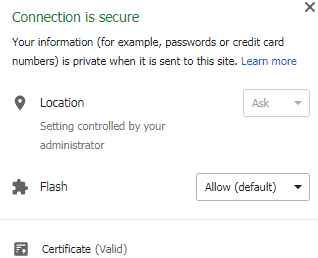
And of course, put IP address of your server in the domain. Afterwards you’ll get a valid domain and you will be able to use your webpage with the certificate.
Webpage app
Create project
To prepare your webpage from vue template you need install node.js and some IDE (for example Visual Studio Code with extension vetur more). This part requires some knowledge of javascript, html, css, and node.js, npm. But it is enough to follow the instructions to create your own website.
We will use very popular javascript framework vue.js, that will compile the whole page for you.
- Install
vue-cli.
npm install -g @vue/cli
- Create your project.
vue create bearspage
Choose 1.default, 2. Use NPM,


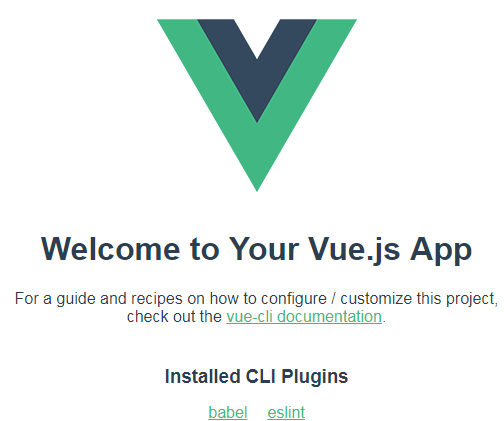
- Verify your webpage, following your commands. On
http://localhost:8080you should see your webpage.
cd bearspage
npm run serve
Add JSON client webpage
When you have your localhost, it is time to add some code to get your page alive and ready to move to the server.
- Install
vue-picture-inputin your project folder. This is a vue template to use for users to upload pictures. https://github.com/alessiomaffeis/vue-picture-input
npm install --save vue-picture-input
- Edit with the editor file
App.vue. This is the main file for your application. Addmounted()method to check if the server is alive and refresh page, and next check console to make sure that the server works (ctrl+shift+J).
  mounted() {
    var request = new XMLHttpRequest();
    request.open('GET',
      'https://YOUR_IP:8000/ping', #URL for your /ping JSON
      true);
      request.onload = function () {
        console.log(this.response);
      }
    request.send();
  }
If you got error response, add to your file server.py the permission to connect from different source and restart the server.
app.add_middleware(CORSMiddleware, allow_origins=['*']) # !! USE ONLY WHEN JSON SERVER IS DIFFERENT THAN HTTP SERVER !!

Now you should get the correct response:

- Add
PictuerInputto your template and upload to the server. For example:
App.vue
<template>
  <div id="app">
    <h1> What a bear is it?</h1>
    <picture-input
      ref="pictureInput"
      width="600"
      height="600"
      margin="16"
      accept="image/jpeg,image/png"
      size="10"
      button-class="btn"
      :custom-strings="{
        upload: '<h1>Bummer!</h1>',
        drag: 'Drag a Picture 😺 of a bear'
      }"
      @change="onChange">
    </picture-input>

     <h1>This is: <span style="color: red">{{name}}</span> for <span style="color: blue">{{pred}}%</span>  sure!!!! </h1>
  </div>
</template>
<script>
import PictureInput from 'vue-picture-input'

export default {
  name: 'app',
  data() {
    return {
      name: '??',
      pred: 0
    }
  },
  components: {
    PictureInput
  },
  methods: {
    onChange(image) {
      if (image) {
        let v = this;
        v.name = "??";
        // console.log('Picture loaded.', image)
        // send image and get response
        var request = new XMLHttpRequest();
          request.open('POST',
           'http(s)://YOUR_IP_ADRESS:8000/bears',
           true);
           var fd = new FormData();
           fd.append("file", image);
           request.onload = function () {
             var data = JSON.parse(this.response);
             v.name = data.predicted;
            let pred = Math.round(data.prob*10000)/100;
            v.pred = pred;
            }
          request.send(fd);
      } else {
        console.log('FileReader API not supported: use the <form>, Luke!')
      }
    }
  },
}
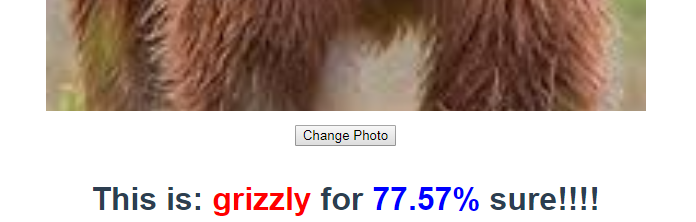
This simple code has one component PictureInput, and reacts to@change="onChange" by sending new XMLHttpRequest(), we put a new FormData(), and our image as a file parameter. In the function onload, we parse JSON query and update values .name, and .pred. This is how the server should work:
Add Camera Input more
You can also add camera as an input. To do that, add the video component to your template. The Camera requires that your server is SSL and authorized by the CA.
<div><video ref="video" id="video" width="640" height="480" autoplay></video></div>
and next add code to connect your component with your camera in the mounted() method.
  mounted() {
    // add video
    this.video = this.$refs.video;
    if(navigator.mediaDevices && navigator.mediaDevices.getUserMedia) {
        navigator.mediaDevices.getUserMedia({ video: true }).then(stream => {

          try {
              this.video.srcObject  = stream;
            } catch (error) {
              this.video.src = window.URL.createObjectURL(stream);
            }


            this.video.play();
        });
    }
  },
- Next step is to capture the image and put it to the sever. To do that, create the
buttonandcanvasto store your image.
    <button @click="onCamClick"> Capture Image and check</button>
    <canvas ref="canvas" id="canvas" width="640" height="480"></canvas>
    <h2>This is: <span style="color: red">{{name_cam}}</span> for <span style="color: blue">{{pred_cam}}%</span>  sure!!!! </h2>
and put your code to store your result, and OnCamClick method to put your image to the server.
  data() {
    return {
      name_cam: '??',
      pred_cam: 0
    }
  },
  methods: {
    onCamClick() {
        this.canvas = this.$refs.canvas;
        var context = this.canvas.getContext("2d").drawImage(this.video, 0, 0, 640, 480);
        var image = canvas.toDataURL("image/png");

        if (image) {
              let v = this;
              v.name_cam = "??";
              // console.log('Picture loaded.', image)
              // send image and get response
              var request = new XMLHttpRequest();
                request.open('POST',
                'http(s)://YOUR_IP:8000/bears',
                true);
                var fd = new FormData();
                fd.append("file", image);
                request.onload = function () {
                  var data = JSON.parse(this.response);
                  v.name_cam = data.predicted;
                  let pred = Math.round(data.prob*10000)/100;
                  v.pred_cam = pred;
                  }
                request.send(fd);
            }

    }
  },
You should see the result:
Put your website on the server
Finally it’s time to move your site to the server. I’ll use nginx as a simple http/httpsserver for the html site.
Build your app. You can now go to the console when you run the server (
npm run serve), and close it byctrl+c.npm run build
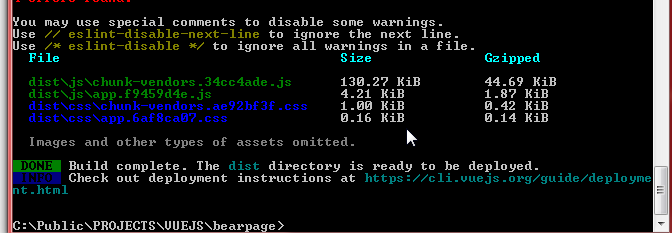
You will see that your project has been compiled into single index.html file with javascript and css in the dist folder.

- Now using
WinSCPor otherSFTP clientconnect to your server and upload your files into some folder for your webpage.

- Install
nginxon the console more
sudo apt-get install nginx
- Go to the configuration of sites available and edit your
defaultfile assudo. For example withvim
cd /etc/nginx/sites-available
sudo vim defualt
The only thing you need to change is your root folder. Change it to your home index.html folder (you can get this folder by command pwd). In the vim the change key is i, and Esc+:qw to exit and save.

If you use domain, change also server_name configuration to your defaultconfiguration.

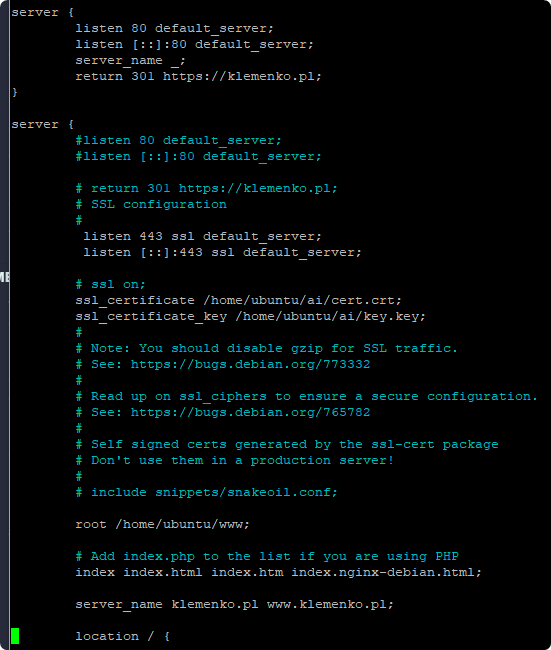
If you use SSL configuration, add SSL configuration to your project. This will autoredirect your page to the SSL page.
server {
        listen 80 default_server;
        listen [::]:80 default_server;
        server_name _;
        return 301 https://klemenko.pl;
}

server {
        #listen 80 default_server;
        #listen [::]:80 default_server;

        # return 301 https://klemenko.pl;
        # SSL configuration
        #
         listen 443 ssl default_server;
         listen [::]:443 ssl default_server;

        # ssl on;
        ssl_certificate /home/ubuntu/ai/cert.crt;
        ssl_certificate_key /home/ubuntu/ai/key.key;
Remember to add port 443in your AWS server.

- Test your configuration file
sudo nginx -t

- To start your server:
sudo systemctl restart nginx
To stop the server:
sudo systemctl stop nginx
To check status of the server:
sudo systemctl status nginx
To check error log of the server:
tail -f /var/log/nginx/error.log
That’s all, you have now working WebPage with the working fast.ai library.